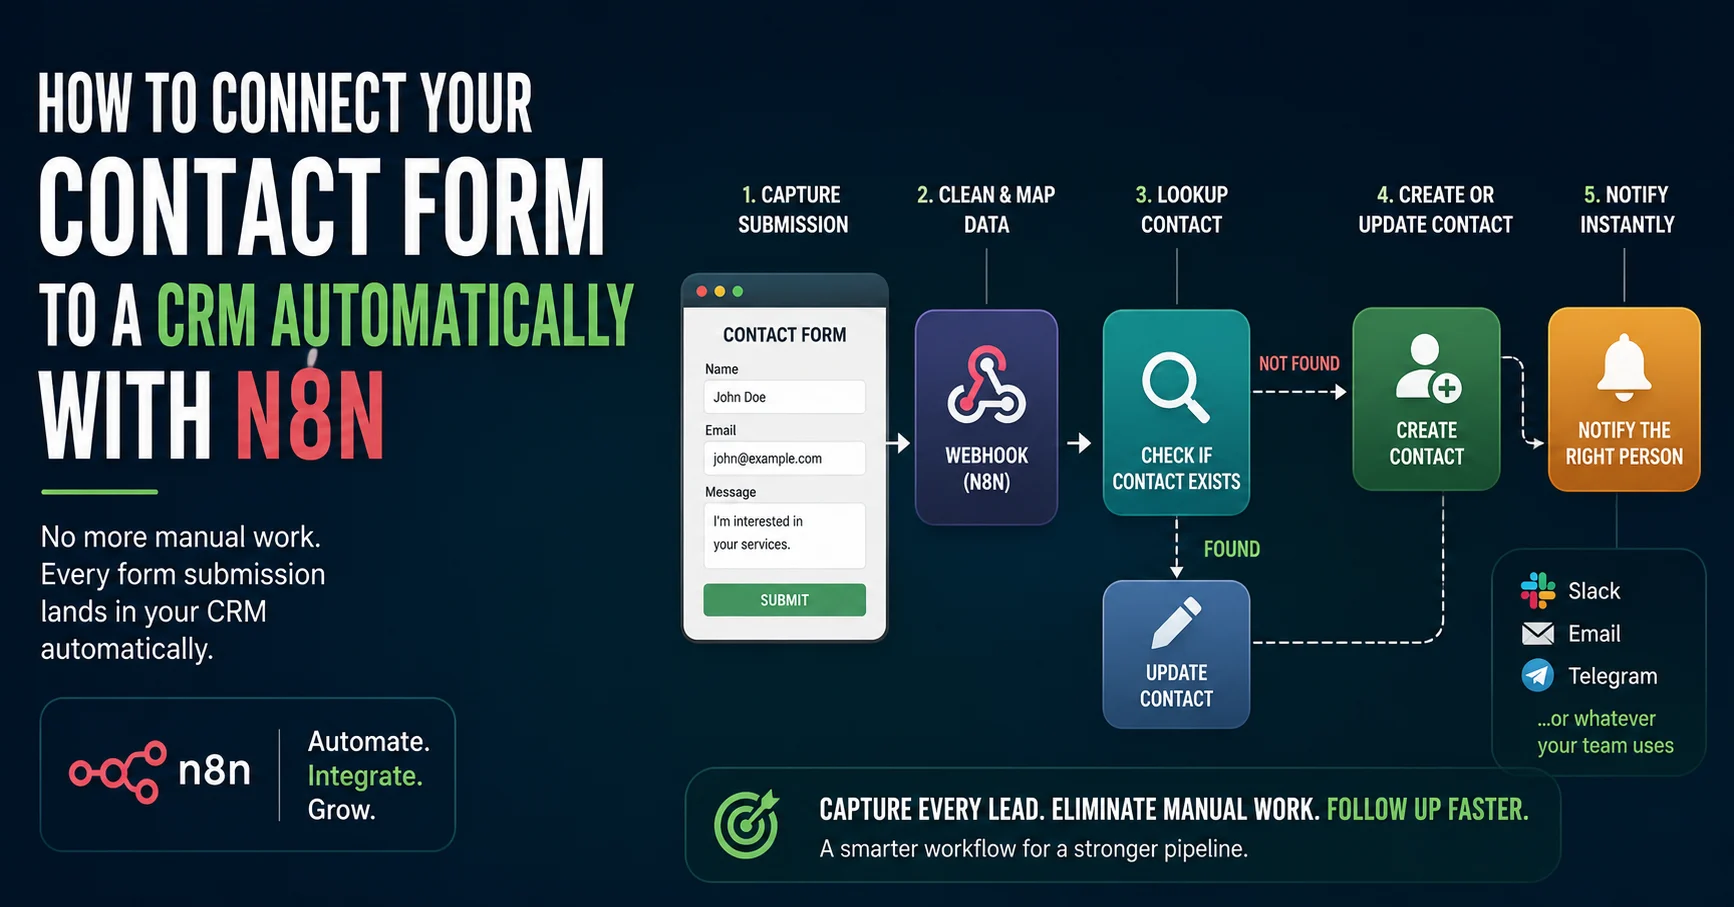
If you’re already using a CRM, you’ve probably run into this gap: leads come in through your website form, but they don’t show up in the CRM unless someone manually adds them. That manual step is where leads get lost, delayed, or duplicated.
This post covers how to close that gap with N8N, so every form submission lands in your CRM automatically, with no copying and pasting involved.
Why this matters more than it seems
A CRM is only useful if it actually reflects what’s happening with your leads. If half your contacts are missing because nobody got around to adding them, your pipeline view is wrong, your follow-up reminders are wrong, and any reporting built on top of it is wrong too.
Connecting the form directly to the CRM means the data is always there, the moment someone submits it, without depending on anyone remembering to do it.
The general approach
Regardless of which CRM you use, the pattern is the same: capture the form submission, map the fields to what your CRM expects, and create or update a contact record. N8N sits in the middle and handles all of this.
Most major CRMs (HubSpot, Pipedrive, Zoho, Salesforce) have either a native N8N integration or a REST API that N8N can call directly. If yours has a native node, it’s faster to set up. If not, the HTTP Request node works with any CRM that has an API, which covers nearly all of them.
Step 1: Capture the submission
This part is the same as any form automation. If you’re using Contact Form 7, WPForms, or a similar plugin, configure it to send a webhook to N8N on submission. Set up a Webhook trigger node in N8N to receive it.
If you’re using a form builder like Tally or Typeform, they connect to N8N natively without needing a plugin.
Step 2: Clean and map the data
Form data rarely arrives in the exact shape your CRM wants. Names might come as a single field when your CRM expects first and last name separately. Phone numbers might need formatting. Custom fields on the form might need to map to specific CRM fields.
Add a Set node after the webhook to reshape the data into exactly what the CRM API expects. This is the step people skip, and it’s usually where things break later.
Step 3: Check if the contact already exists
Before creating a new record, check whether this email already exists in the CRM. Most CRM APIs have a search or lookup endpoint for this. If the contact exists, you want to update their record (and maybe log this as a new interaction) rather than create a duplicate.
This single check prevents your CRM from filling up with duplicate entries over time, which is one of the most common CRM hygiene problems.
Step 4: Create or update the contact
Based on the check in step 3, either create a new contact or update the existing one. Most CRM APIs have separate endpoints for create and update, so this becomes an IF node that routes to the right HTTP Request based on whether a match was found.
Include any relevant context from the form: what they were asking about, which page they were on, what service they’re interested in. This context is often what makes the difference for whoever follows up.
Step 5: Notify the right person
Once the contact is in the CRM, send a notification to whoever owns that lead or territory. This can be a Slack message, an email, or a Telegram notification, whatever your team actually checks.
The goal is that within seconds of someone filling out a form, they exist in your CRM and a human knows about them.
What this changes in practice
Once this is running, your CRM becomes a true reflection of your pipeline rather than a partial one. Every lead is captured, nothing depends on someone remembering, and follow-up can start immediately instead of days later.
If you’re using a CRM and your website forms aren’t connected to it yet, this is one of the highest-value automations you can set up. If you want help getting this running for your specific CRM, get in touch and we can map out exactly what it would take.